Sunday, June 29, 2014

Classroom Overhaul -- Step 3: Too Many Books!

I have too many books! They spill out of shelves, baskets, boxes and cabinets in my first grade classroom.  Don't tell me I need to get rid of them -- that's not an option! Instead, I needed to get them organized!  Here's what I did to get a handle on thousands of books I have in my classroom.


Step 1: Acquire new shelves.  
I had been storing my books on a huge bookshelf I got from a store that was going out of business. The problem was that I frequently take sections of books out for thematic units. The remaining books would fall over, creating a mess.


My son had a huge set of the white "cube" shelves from Target.  I confiscated them and took them to my classroom.  He was using the shelves to store collections of Bionicles and Legos that he was pretty much done with, so it all worked.


Step 2: Make new genre markers.  For years, I used tags I had made out of cardstock. They were pretty beat up. I made a new set out of a cute "circle badge" design I got for free from The Hazel Owl. I laminated them and glued them onto paint sticks that I spray painted green.


Step 2: Move the books and insert the genre markers.  The books seemed to all fit into their sections!

The final result is so much neater and easier to manage!


Classroom Overhaul!

My classroom needs a facelift. It's cluttered, busy, and not as "cute" as I imagine it could be. I look at pictures of classrooms on Pinterest and want the cute factor, but then I question how practical many of these classrooms are. I mean, let's face it, I need a fully functional classroom to accommodate messy first graders, lots of paint, glitter and glue, thousands of books, and 20+years of teaching supplies.

First, I need to think about what works, what doesn't work, and what I want.

Things That Don't Work:
Things I Want:

Things I Can't Change:

  • Furniture
  • Limitations on hanging stuff from ceiling
  • Lots of STUFF!

Join me this summer as I undertake a complete classroom overhaul!


Classroom Overhaul -- Step 2: Make Table Skirts

My classroom tables (like much of the furniture in my room) are not pretty. In fact, a couple of them are downright ugly. I got at least two of them from the salvage department for our district. Like my file cabinets, they need a makeover if they are going to have a place in my new "pretty" classroom.

After looking around for ideas, I decided on making table skirts. Not only would they hide some of the ugliness of the tables, but they would also hide the tubs I tend to stash underneath.

The issue: how to make them?  My teammate Heather over at Worf's Wiggle Worms has a cute table skirt, but she has had mixed results when she used velcro tabs. They keep falling off.  Our teammate Jenney had her mom sew table skirts. She stapled them into the edge of the table, and they've stayed up really well. But I don't sew, and I want to be able to remove mine for messy art projects.

My super crafty husband came to the rescue!  He offered to make table skirts for me!  The results look awesome!  Here's how he did it.


Step 1: Measure the tables. 
Get the length and the width, and then figure out how much you want the fabric to hang over the table. Add that on to your measurement.


Step 2: Find the material.
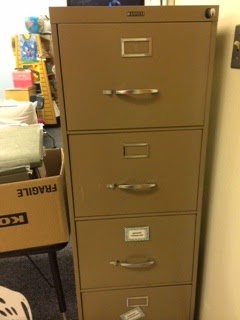
We got my fabric from Hobby Lobby for 50% off. We chose a heavier fabric so it would hang properly. I selected this particular style because the colors go with the colors that I already have on my classroom walls. This also matches the file cabinets I just repainted.

Step 3: Iron the fabric.
We ironed the edges of the fabric to create 3/4" folds for the hems.

Step 4: Hem it on the sides and bottom.
On the bottom and sides, he did a wide, long zig-zag stitch.


Step 5: Sew on the Velcro.
On the top, he sewed the Velcro on as he stitched it with a straight stitch.  We used sewing Velcro, not sticky Velcro. Sticky Velcro makes a mess with the needles.


Step 6: Attach sticky Velcro to table.
I had a couple of big rolls of Velcro at school, so we just wrapped it around the front and sides of the table.  We experimented with how high we wanted to attach the Velcro to the table so the table skirt would align with the edge of the table.

Step 7: Attach the table skirt.
Once the Velcro was on, we attached the skirt.


The final product!
It needs to be ironed one more time, but I'm thrilled with how it looks!


Tuesday, June 24, 2014

Classroom Overhaul -- Step 1: Paint the File Cabinets!

One of the big projects on my to-do list this summer was to paint and organize the file cabinets in my classroom. Ughh! This is a project I've been needing and wanting to do for several years, but I've been a little daunted by undertaking such a big task.

Once I got into it, I couldn't believe how easy it was!  The entire process of transforming two UGLY metal file cabinets took about 6 hours.  I love the way they look now! As a bonus, I organized my files as I was putting them back in, and got rid of 2 whole drawers worth of outdated resources.

The tools I used:
drop cloths
spray paint (paint and primer for metal, wood or plastic)
screw driver (to remove the handles
mask


Step 1: Empty and remove the drawers.


Optional: Remove the hardware. I removed the handles from one set of drawers, but not the other. 


Step 2: Sand and clean the drawers. I used fine grit and lightly sanded the surface. After sanding, I sprayed the drawers with a household cleaner and wiped them down with a paper towel.


Step 3: Spray paint. I selected the colors I use in my my classroom: blue, green, and yellow. I used paint and primer spray paint for wood, metal or plastic.  The drawers only needed about two coats each, but the cabinets took 3-4 coats. I ended up using about 8 cans of paint for the 2 cabinets.  I sprayed the drawers in my classroom. The cabinets were big, so I moved them outside. I used a mask, as recommended when working with spray paint.


And voila! The finished cabinets look great!!


Tuesday, June 3, 2014

Getting Them to Write! Teaching Informative Writing to 1st Graders Through Thematic Units

Summer is the perfect time to reflect on what worked well with  my first graders and what didn't.  One thing that went really well this year was teaching my kids how to write informative pieces.  

Summer is also the perfect time to go back to units that I created early in the year and tweak them. I was doing just that with my Africa unit a few days ago, and I was struck by how far my kids came with their writing this year.  

Take a look at the writing paper that I developed for my beginning first graders in September.  I recall one little guy who looked at me with horror when he saw the writing paper below. "You expect us to fill up all those lines,?" he asked.  Little did he know that in May, he'd be requesting a 2nd page when writing about toucans (on paper with many more lines)!


So...how did we get from this...
Beginning of the Year Neat Sheet
Africa Unit
 to this?
End of the Year Neat Sheet pg 1
End of the Year Neat Sheet pg 2
Amazing Animals of the Amazon Rainforest

Like anything else with teaching, it's a process!  In this case, it's teaching kids the writing process.  

Embedding Writing Within Thematic Units
I embed writing instruction in thematic units.  In first grade, we study animal habitats.  Throughout the year, we learn about everything from anteaters to zebras. The kids love making craftivities, but its not just about the projects. They also learn how to get facts about animals through research, write rough drafts, edit their work, and revise to the point that they can write a "neat sheet."

Progression of Writing Throughout the Year
Throughout the school year, I teach between 5-7 habitat units, depending on our time.  Following is a chart detailing the progression of writing instruction.


Facts Webs
Beginning of the Year Facts Web
African Habitats Unit
Mid-End of the Year Facts Web
Ocean Animals Unit
Rough Drafts

Beginning of the Year Rough Draft
African Habitats Unit
Mid-Year Rough Draft
Polar Animals Unit

Editing Sheets
Africa Unit Editing Sheet Sample
African Habitats Unit


Neat Sheets 
Beginning of the Year Neat Sheet
African Habitats Unit
End of the Year Neat Sheet pg 1
Amazing Animals of the Amazon Rainforest 
End of the Year Neat Sheet pg 1
Amazing Animals of the Amazon Rainforest

My thematic habitat units are available for purchase in my Teachers Pay Teachers Store for $7.50 each. Click on the links, and download the previews for detailed descriptions of each unit.


I sure would love to hear how you teach informative writing in your classroom! Leave a comment below, and let's chat!